
How to Sow Seeds Indoor
As spring is just a short few weeks to go, February in the garden is a time of year for tidying up and preparing for summer. For a Gardening enthusiast it’s a very enjoyable project. It’s time to start sowing your seeds on a sunny windowsill indoors and set up for spring and summer. The best part is that you don’t need to invest a lot of money! Sowing seeds, tidying up the garden, preparing the soil, and all these activities are cheap and exciting for any gardener.
Choosing your Seeds
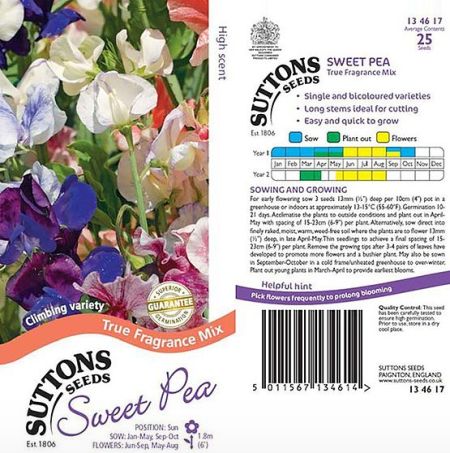
Make sure you check the back of the packets when you’re deciding what to plant. Ensure you sow it in the correct month so then you will have enough time until the harvest. A large selection of vegetables must be started in early February, indoors and so with flowers.
Always remember, the fresher the seed, the greater the chances that the seeds will still be effective. Each seed contains a plant embryo that needs to stay alive until its time to germinate. Because of that, its very important that you keep your seeds in a sealed container in a cool place: the refrigerator is ideal. It’s also beneficial if you keep the humidity low in the container, you can do it by adding a bag of silica gel or you can use a teaspoon of powdered milk in a piece of facial tissue (paper towel can also absorb moisture). To summarize, do not buy loads of seed all at once if you are not going to use it within two or three years, and make sure you store them correctly.
Sowing under Cover

Sowing your seeds indoor while conditions outside are not great, means you can raise strong and healthy seedlings, safe from the cold weather and pests. The ideal is to start seedlings off under the protection of a greenhouse, a cold frame, or you can do it inside your house on your windowsill (Just be careful because windowsills can be very cold, so make sure the temperature is ideal). A greenhouse would trap the sun’s light and warmth and keep it for longer. Inside a greenhouse, nights are less cool and sunny days are considerably warmer.
As stated above, windowsills can be a convenient option to start sowing your seeds. Sow it into pots or smaller seed flats if it fits on your windowsill. Some vegetables such as peppers and tomatoes may benefit from the extra warmth and humidity (important factors to take in consideration when sowing seeds) of a propagator, or you can replicate these conditions by putting a clear plastic on top of the pots and secure it using an elastic band.
As you started sowing, after two or three days, start cheeking daily to see if there is any sign of germination. When they start to germinate you can move it to a greenhouse, or cold frame. If can’t invest on a greenhouse and want to keep growing seedlings indoor, use artificial grow lights to ensure they are growing and strong.
When to Sow
Follow your seed packet instructions, as each species has its own requirements. In Ireland, annual flowers, and heat-loving vegetables such as tomato, pepper, and eggplant are usually started in early spring. Cabbage and broccoli intended for fall crops may be started indoors in June or July. Tiny seeds, such as those of alpine strawberry, may need to be started as early as February.
Light
If there is not enough natural light available where you live means you will need artificial lighting to grow your seeds. The lack of light is the major cause of elongated and skinny stems. At this stage, plants usually need 12 to 16 hours of light daily, however the dark period is also very important for the plant to grow and develop properly. A timer can be helpful on this process. Hang the lights from chains so then when the plants grow you can easily raise the lights. They should be positioned approximately two inches above the tops of your seedlings. Finally, you can use cool white and daylight tubes to provide good light for your plants.
Seed Trays X Module Trays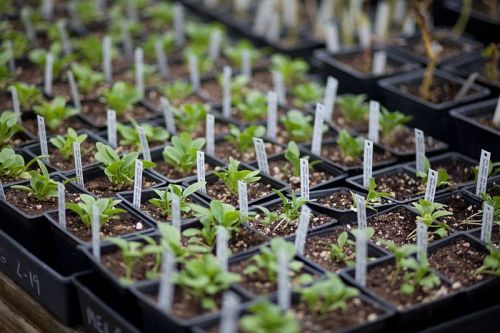
Seed trays are very useful and handy if you are sowing small seedlings. However, if you fill a seed tray with mixed seedlings, their roots can grow into each other and can make transplanting much harder. Module trays minimise the risk of root damage and can save your time, since many times they can go straight from the tray to a pot. Additionally, there is a large variety of sizes of module trays, choose the correct one according to the size of the seed. For example, if you are sowing larger seeds such as beans, you should choose one with bigger plugs, but if you are sowing crops such as radish, smaller plugs are the correct choice. Either way, assure that the container you choose have drainage holes at the bottom.
Sowing into a Plug Tray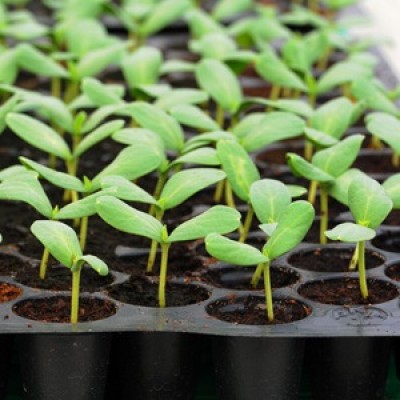
The first thing to pay attention is the quality of the compost you are using, make sure you use good quality all-purpose potting mix. In order to make it smoother you can sieve it; this will make the texture of the compost ideal for sowing.
Fill the spaces with the potting mix while you push it down in order to make it firm. If the spaces are very small, you can do it using your fingers, add a little more of potting mix on top of that. Then, gently make small holes, don’t go really deep. Most of the seeds do not need to be sown deep, position it with a covering of approximately a quarter of an inch.
Once you finished sowing, ensure all the seeds are buried by sieving a little more potting mix over the top. Water the trays carefully, making sure that the potting mix is completely moistened through. Don’t forget to label the trays with the seed type and the date it was sowed.When your plug plants start to grow, their demand for water will increase. If you feel that the compost is dry, you should water it, do it on a regular basis using your fingers. It is important that you make sure they are correctly watered, so don’t expose it to excessive humidity.
Moving seedlings outdoors

When it’s time to bring your vegetables and flowers outside make sure you don’t move it outside permanently straight away. Plants that started indoors won’t suddenly adapt to direct sunlight, wind, or unstable temperatures. The process of gradually expose plants to outdoor environment is called “hardening off”. For approximately two weeks before moving them outdoors, you should start bringing them outside for a couple of hours, every day. Start by putting the plants outside in the shade during the warmth of the afternoon.
Choose a spot protect from the wind and direct sunlight and bring them back indoors before the temperature starts to drop. You should slowly expose them to sunshine each day. In two weeks, times, if the weather is favourable the seedlings can stay outside in a sunny area until they are ready to be transplanted into the garden.If you can, an easy way to harden off is to use a cold frame which will act similarly to a greenhouse.
Transplant on a cloudy day or late afternoon when the sun has passed its peak. Even hardened off plants may wilt when first exposed to full sun, but they generally recover within a day or so. Row covers and other types of plant protectors can help even plants get off to a good start in the garden by reducing damage from wind and temperature fluctuations.
When transplanting seedlings grown in peat pots, newspaper pots, cow-dung pots, or any other containers made of organic matter, trim the pots down to soil level. The collars of these pots, exposed to drying air, will wick water away from the root zone. To encourage roots to spread out into garden soil, carefully cut or tear holes in the bottoms of these pots, because they usually don't break down completely in the soil, and may inhibit root growth.
Lenehans Has It
From stunning flowers to vegetables and fruit varieties, Lenehans has a huge selection of seeds available for next day delivery. Check our website for new spring varieties of Seeds 2022.
Resources
- https://www.growveg.co.uk/guides/sowing-seeds-absolutely-everything-you-need-to-know/
- University of Minnesota Extension Horticulture